Taste Approach: An Illustrated Guide
to Dentists and Bruxers
Despite is promise, the taste-based approach is not yet
commercially available. I myself have moved to another area of research, and can no
longer reply to requests for help and advice (I deeply apologize for this, but you can
just do so many things on this brief journey!). Anyway, years may pass before you can buy
the liquid-filled capsules at your neighborhood drugstore. In the meantime, anyone,
anywhere, has my permission to use this approach in any way they like. So, if you
are one of those clinicians who care enough about their patients to try something that may
actually help them, or if you are a self-assertive, technically proficient bruxer, the
following comments may ease your task of actually using this approach.
The Dental Appliance
The appliance is the easy part. It should be made of
hard wire, sit securely in the mouth and be as comfortable as a retainer. It should be
worn anytime grinding or clenching of teeth is suspected.
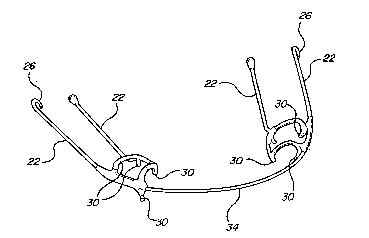
| A diagram of one possible
configuration of this appliance appears to the right. 22 posterior
rod of a mandibular dental appliance to which a capsule can be attached
26 curl in one posterior rod to prevent slippage of capsule
30 hinge of appliance to secure it to teeth
34 anterior connection of two sides of appliance |
 |
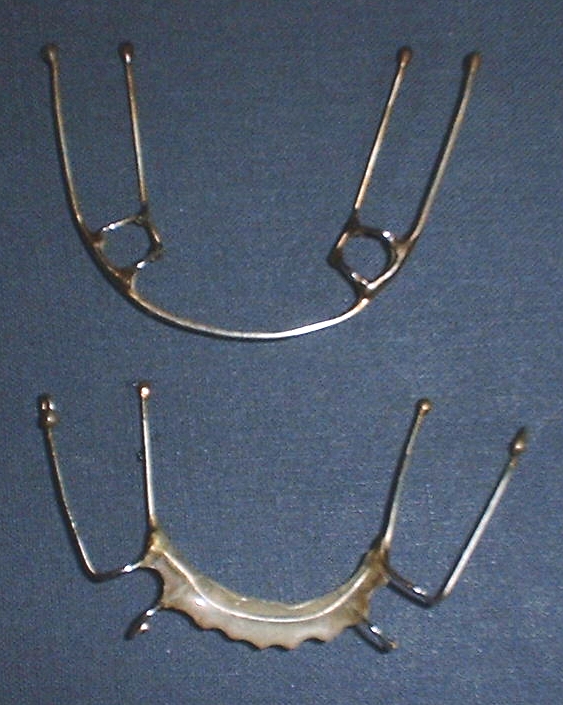
The following diagram shows two possible configurations for this appliance:


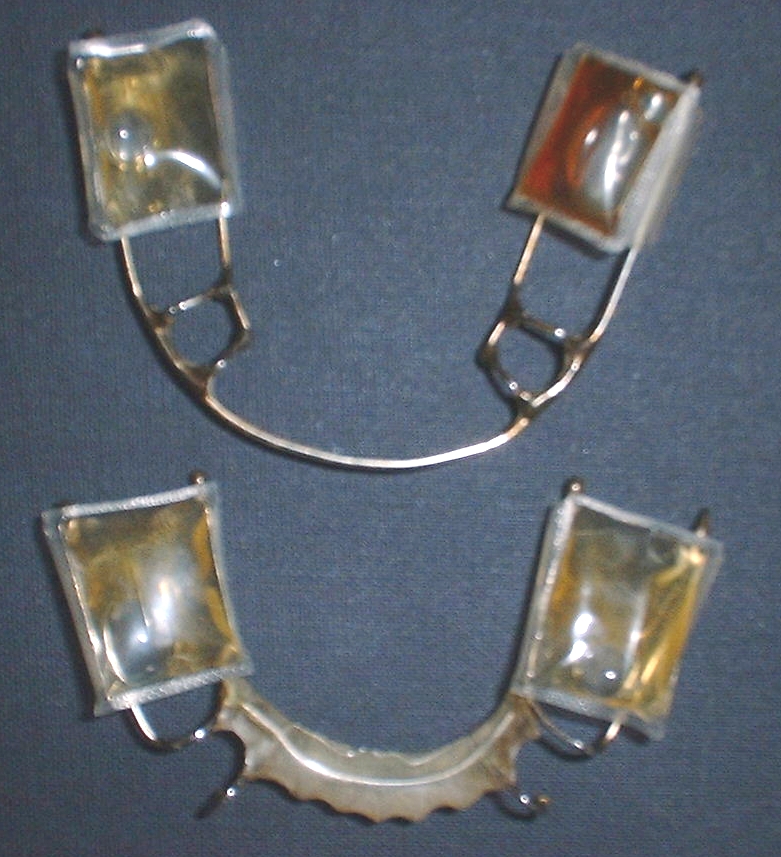
The next diagram shows two appliance configurations with the capsules attached:

The Capsules
These can be made in a variety of way, from a variety of materials. Only
one variation will be shown here.
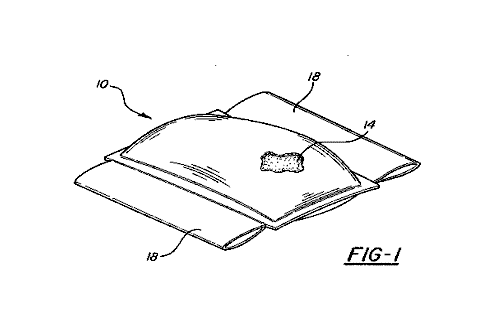
| First, a diagram: 10 small capsule,
container, bag, or reservoir
14 constituents of capsule
18 sleeve of capsule |
 |
These can be made with an Impulse Sealer and plastic tubing. I get both from the
following address:
Altech Packaging Co., Inc.
330 Himrod Street
Brooklyn, New York 11237
The label on the outside package of the plastic tubing is: 1-Tv 1" x 003.
The impulse sealer is: ATew@ (brand-name), TISH-300.
The next step is to set up your own little laboratory/factory. You will need to think
about what kind of liquid to put in your bags. I use a very strong solution of ground hot
peppers and vinegar (with alcohol, the bags don't seal well). The goal is to wake up a
bruxer, but not to punish. After grinding the pepper (or horseradish, or . . .) in a
blender, you can run it through a filter or cheesecloth.
It may be a good idea to have a second appliance ready. On rare occasions a bag
ruptures, one can replace it half-awake-- this takes a few seconds only and hardly
interrupts sleep.
To prepare the bags, you will need a straw, a syringe (without a needle) or a pipette,
double-sided scotch tape, a pair of sharp, small scissors, and time—until the process
is commercialized, quite a bit of time. Anyway, here are the stops to follow:
- Set up your laboratory--dining room table is fine. Have all the above equipment on the
table, including your impulse sealer and the plastic tubing. You may want to use a bath
towel as a tablecloth as inevitably some of your liquid will spill.
- Cut a length of plastic a little shorter than the heating element. Open the plastic so
that the folded sides now meet in the middle of the tube. If you leave it folded, you will
never get it open after you start to seal it.
- Put two sided tape below the Teflon on the metal plates that hold the heating element.
This holds the plastic tubing securely in place. The tape should be stuck NEXT to the
heating element--NOT on it!
- With the help of the tape, align the plastic to the sealer. You are going to make one of
the
ssleeves.
This part is tricky--it is hard to always get an even sleeve the length of the plastic. It
does not have to be exact--your appliance just needs to be able to hold the bag and it
needs to fit over your teeth.
Turn it around and make the next sleeve. Refer to the diagram above.
Seal the bottom.
Use your pipette or your syringe with the straw to put the liquid in the plastic tubing.
Fill it about 70% full and seal the top.
Starting at one end, start sealing the bags. Each one should be approximately 3/4 of an
inch long. Seal one at a time and make them as puffy as you can.
Upon inspecting your work you may find some of your bags are leaking, sometimes you are
able to rescue them by going back and resealing them, but not always. If they are not
sealed, they are useless, and you will have to throw them away.
Cut the good bags away from the rest and CAREFULLY cut open the little corners of the
sleeves.
Wash the bags thoroughly, first with rubbing alcohol , then with detergent, then rinses
them thoroughly with water and then let them dry. This is important--the bag should be
taste-free.
In the beginning, a bruxer may rupture a few bags a week. But, within a few weeks, a
bag may rupture only once every two weeks or so. So bags can be re-used over and
over again. Remove the retainer in the morning, runs tap water through the sleeves
of the bags (to wash away accumulated saliva), and soak it 20 minutes in a cup of
water with a few drops of detergent. Rinse the retainer and bags, dry them with a towel,
and they are ready for use the next night.
Back to Bruxism, Main Page


